
Alpharetta Wood Flooring handles hardwood floor installation in Alpharetta, GA and has put down wood floors for 20+ years, serving surrounding cities including Roswell, Milton, Peachtree Corners, Norcross and Sandy Springs. We install solid hardwood over prepared subfloors, extend existing floors into new rooms, and finish floors in place or install them prefinished.
Most installation problems are decided before the first board goes down. A subfloor that bounces, a room that was never measured for moisture, or boards fastened with the wrong nail spacing will all show up later as squeaks, gaps or cupping. We spend the first part of every job on those checks, because a well-prepared floor is the one that stays flat and quiet.
We also think about how the new floor meets the rest of the house: the kitchen tile, the stairs, the doorways and the rooms you might floor later. Planning those edges first is what makes a floor look like it was always there.
Preparing the Subfloor
Checking Flatness and Stiffness
Solid hardwood needs a flat, stiff subfloor, usually plywood or OSB fastened to the joists. We check for high and low spots with a long straightedge and walk the floor for bounce between joists. High spots are sanded down, low spots are filled or shimmed, and loose areas are screwed tight to the framing.
Skipping this step is how new floors end up with hollow spots and squeaks that no amount of nailing will fix. It is also the part of the job nobody sees afterward, which is exactly why it gets rushed elsewhere.
Moisture in the Subfloor and Below
A subfloor that reads wet will dry out after the hardwood goes down, pulling the boards with it and opening gaps. Over a crawlspace, we look underneath for bare soil, standing water or a missing vapor retarder. Over a slab, solid hardwood needs a wood subfloor built on top or a switch to engineered flooring.
We record the subfloor readings alongside the board readings before installation begins. Those numbers matter if a question about the floor ever comes up later.
Removing the Old Flooring
Most installations start by removing carpet, vinyl or old tile. Carpet, pad and tack strip come out quickly, while tile and its underlayment take more work. When old floor tile or black mastic is found, we recommend testing before it is disturbed, since some older materials contain asbestos.
Choosing the Boards
Red Oak, White Oak and Other Species
Red oak is the most common hardwood in area homes, with a warm tone and pronounced grain. White oak is slightly harder, with a tighter grain that suits natural and gray finishes. Hickory and maple offer higher Janka hardness, and heart pine brings an older look with its own quirks.
Matching the species of an existing floor matters most when the new floor will run into it. For a separate room or level, you have more freedom to choose.
Width, Grade and Length
Narrow strip flooring gives a traditional look, while wider plank boards show more grain and suit open rooms. Grade describes how much color variation, knots and mineral streaks the boards carry, from clean select grades to character-filled rustic grades. Longer average board lengths make a floor look calmer and more expensive.
Solid or Engineered
Solid hardwood can be sanded many times and suits floors over a wood subfloor on grade or above. Engineered flooring is better on slabs, terrace levels and anywhere moisture is a concern. We recommend the one that fits each room rather than using one product everywhere.
Installing the Floor
Layout and Starting Lines
We snap a straight starting line off the longest, most visible wall and plan the layout so boards run in the most pleasing direction, usually along the length of the room or across the joists. Board ends are staggered so no joints line up in adjacent rows. An expansion gap is left at every wall, hidden later under baseboard or quarter round.
Fastening to NWFA Guidelines
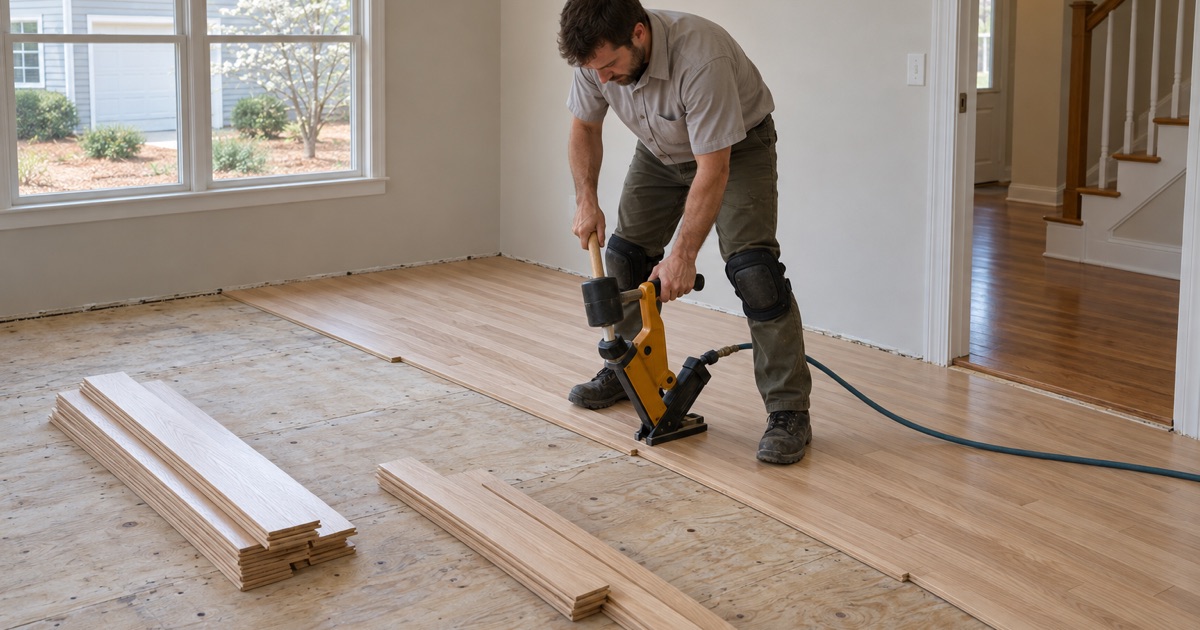
Solid hardwood is blind-nailed through the tongue with flooring cleats or flooring staples, at the spacing the manufacturer and the NWFA Installation Guidelines call for. Too few fasteners let boards move and squeak, and the wrong fastener can split the tongue. We match the fastener to the product and the subfloor.
Near walls, where the nailer cannot reach, boards are face-nailed and the holes filled to match. Those rows are the ones most often done carelessly, and the ones most often seen.
Transitions, Reducers and Stair Nosing
Where hardwood meets tile, carpet or a sunken room, a reducer, threshold or T-molding finishes the edge. At stairs, a stair nosing carries the floor over the top step. We match these pieces to the floor species and finish so they read as part of the floor.
Site-Finished or Prefinished
Site-Finished Hardwood
Unfinished boards are installed, then sanded flat and finished in place. The result is a smooth surface with no bevels between boards, and you can choose any stain color and sheen. It takes more days and involves sanding, but it gives the most seamless floor.
Site finishing is also the natural choice when new flooring runs into an existing site-finished floor. Sanding and finishing old and new together is the only way to make the join disappear, and it lets both areas take the same stain.
Prefinished Hardwood
Prefinished boards arrive with a factory finish, so the floor is usable as soon as it is installed. They have small bevels between boards and a fixed color. Factory finishes are very durable, and installation is quicker and cleaner.
The bevels do collect a little dirt, and when a prefinished floor is eventually sanded, some old finish stays in them. For busy households that want to move back in quickly, that tradeoff is usually worth it, and a screen and recoat can refresh the factory finish for years before any sanding is needed.
- 20+ Years on Wood Floors
- Moisture Readings Before Sanding
- Stairs Quoted Tread by Tread