
Alpharetta Wood Flooring builds and refinishes hardwood stairs in Alpharetta, GA and has 20+ years of stair work behind it, serving surrounding cities including Roswell, Milton, Peachtree Corners, Norcross and Sandy Springs. We convert carpeted staircases to wood treads and risers, refinish worn stairs, and match every flight to the floors at the top and bottom.
A staircase is the most hand-built part of any floor job. Each tread is measured and fitted on its own, nosings and returns are cut to follow the stair’s shape, and every surface is sanded by hand or with small machines because a floor sander cannot reach it. That is why we quote stairs tread by tread and riser by riser rather than by the square foot, and why the number we give you holds.
Many homes built in the 1990s and 2000s came with carpeted stairs over construction-grade treads, often next to site-finished oak floors. Bringing those stairs up to match the wood around them is one of the biggest visual changes a house can get, and it removes a surface that collects dust and wears through on the front edge of every step.
Converting Carpeted Stairs to Hardwood
What Is Under the Carpet
Under most carpeted stairs are rough treads, carpet pad, tack strip and hundreds of staples. The treads were built to be covered, so they usually have knots, gaps and fastener holes that would show through any finish. We lift a corner before quoting to see what we are working with.
Occasionally the original treads are good enough to refinish, especially on older homes or where a previous owner laid carpet over finished stairs. When they are, we tell you, because refinishing is quicker and cheaper than replacing.
New Treads, Risers and Nosings
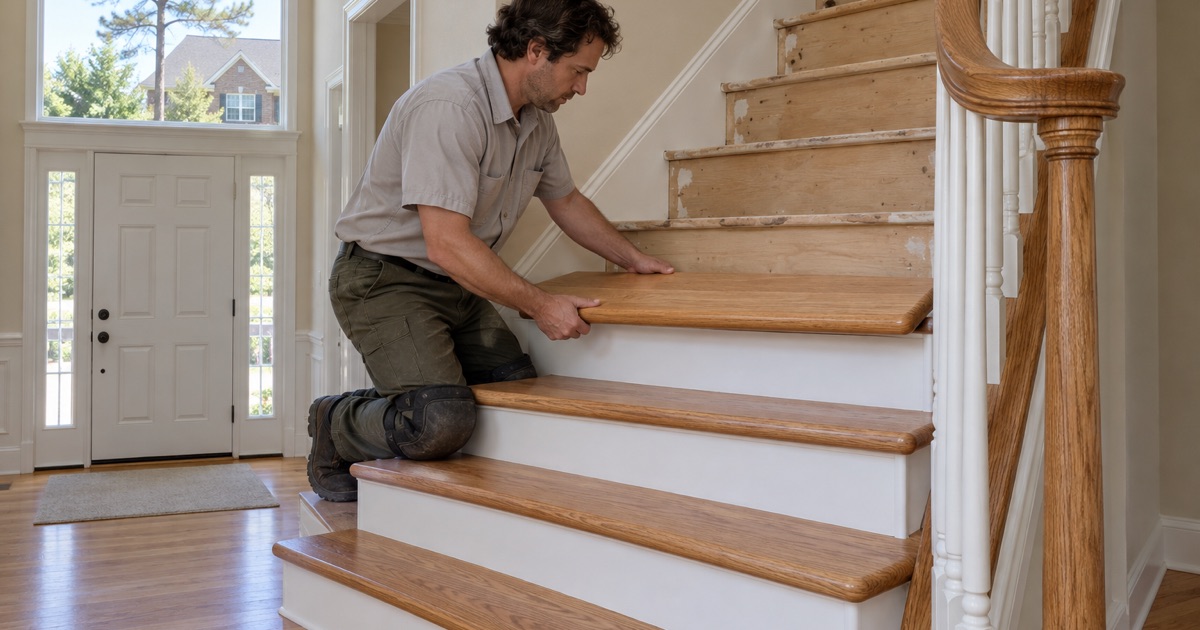
Most conversions use new hardwood treads with a bullnose front edge, new risers, and returns on any open side of the staircase. Each tread is scribed to the walls and stringers so it sits tight without gaps. Treads are glued and fastened so they stay quiet and solid for years.
We order stair parts in the same species as your floors, most often red oak or white oak. Unfinished treads can then be stained on site to match a site-finished floor exactly.
Open Sides, Landings and Balusters
Stairs with an open side need mitered returns on the end of each tread and careful work around balusters. Landings are floored like a small room and finished with a nosing where they meet the next flight. We work around existing railings or coordinate with a railing installer when balusters are being replaced at the same time.
Curved and winder stairs take the most time, because every tread is a different shape. We make a template for each one before cutting the hardwood, so the finished treads fit the curve of the stringer without filler or gaps.
Refinishing Existing Wood Stairs
Worn Treads and Nosings
The front edge of each tread, the stair nosing, takes the most wear, and on busy stairs it goes gray while the rest of the tread still looks fine. Refinishing sands each tread, riser and nosing back to bare wood by hand and with detail sanders. The stairs then get the same stain and finish as the floors.
Worn treads that have been sanded before may be too thin to sand again safely. In that case we replace individual treads rather than the whole staircase.
Matching Stairs to Refinished Floors
When floors are refinished and stairs are left alone, the difference in color and sheen stands out immediately. We stain and finish stairs with the same products as the floors, and we lay stain samples on a tread as well as the floor, because vertical and horizontal surfaces can read slightly differently in the same light.
Stairs also sit in different light from the floors around them, often under a window on a landing or in a darker stairwell. A color that looks right in the living room can look much darker on the stairs, so we confirm it on both before staining.
Loose and Squeaking Treads
A squeaking stair usually means a tread moving against a riser or stringer. We refasten and glue loose treads from above or, where there is access, from underneath the staircase. It is far easier to fix squeaks during a refinish or conversion than after the new finish is on.
A tread that has split or has a large crack across the grain is replaced rather than glued. Stairs carry concentrated weight on a narrow surface, and a weakened tread is a safety problem as well as a noise.
Design Choices for Hardwood Stairs
Stained or Painted Risers
Stained risers give a continuous wood look from floor to floor. Painted risers, most often white to match trim, create contrast and hide scuffs from toes and shoes. Both are common, and we can show you each before you decide.
Painted risers also pair well with painted stringers and skirt boards, tying the staircase into the trim of the house. If you choose paint, we paint the risers before the final coat of finish on the treads so the two edges stay crisp.
Stair Runners and Grip
A runner down the center of the stairs adds grip, softens footsteps and protects the wood from wear, while showing the finished treads at the edges. We finish the full width of each tread so the runner can be changed or removed later. A matte or satin sheen also helps footing on bare wood.
For households with dogs, a runner protects both the treads and the dog, since claws slide on finished wood. Individual stair treads with a rug or carpet pad backing are another option that leaves more of the wood visible.
Species and Hardness
Red oak and white oak are the usual choices because they match most floors, but hickory and maple are harder and resist dents from shoes and dropped items. Janka hardness gives a rough comparison between species. On stairs that see heavy traffic, a harder species or a durable finish extends the time between refinishes.
When the floors are a species that is hard to find as stair parts, such as heart pine or a wide plank, we can have treads milled from matching stock. That keeps the staircase and the floors reading as one material rather than a close substitute.
Our Step-by-Step Hardwood Stairs Process
Step 1: Measure and Quote Each Tread
We measure every tread, riser, landing and return, check under the carpet, and give you a written price per part of the staircase. You know exactly what is included before we start.
Step 2: Remove Carpet and Prepare
Carpet, pad, tack strip and staples come out, and we cut back any overhanging nosings on the original treads. The stringers are checked for level and any loose parts are fixed.
Step 3: Install Treads and Risers
Each tread and riser is fitted, glued and fastened, with returns on open sides. We work from the bottom up so each step supports the next.
Step 4: Stain and Finish
We sand the new or existing parts smooth, lay stain samples, and apply the stain and finish you chose. The stairs stay closed until the finish can take foot traffic.
- 20+ Years on Wood Floors
- Moisture Readings Before Sanding
- Stairs Quoted Tread by Tread